BLUETTI AC240 2400w IP65 Water Resistant Modular Solar Generator Battery Power Station
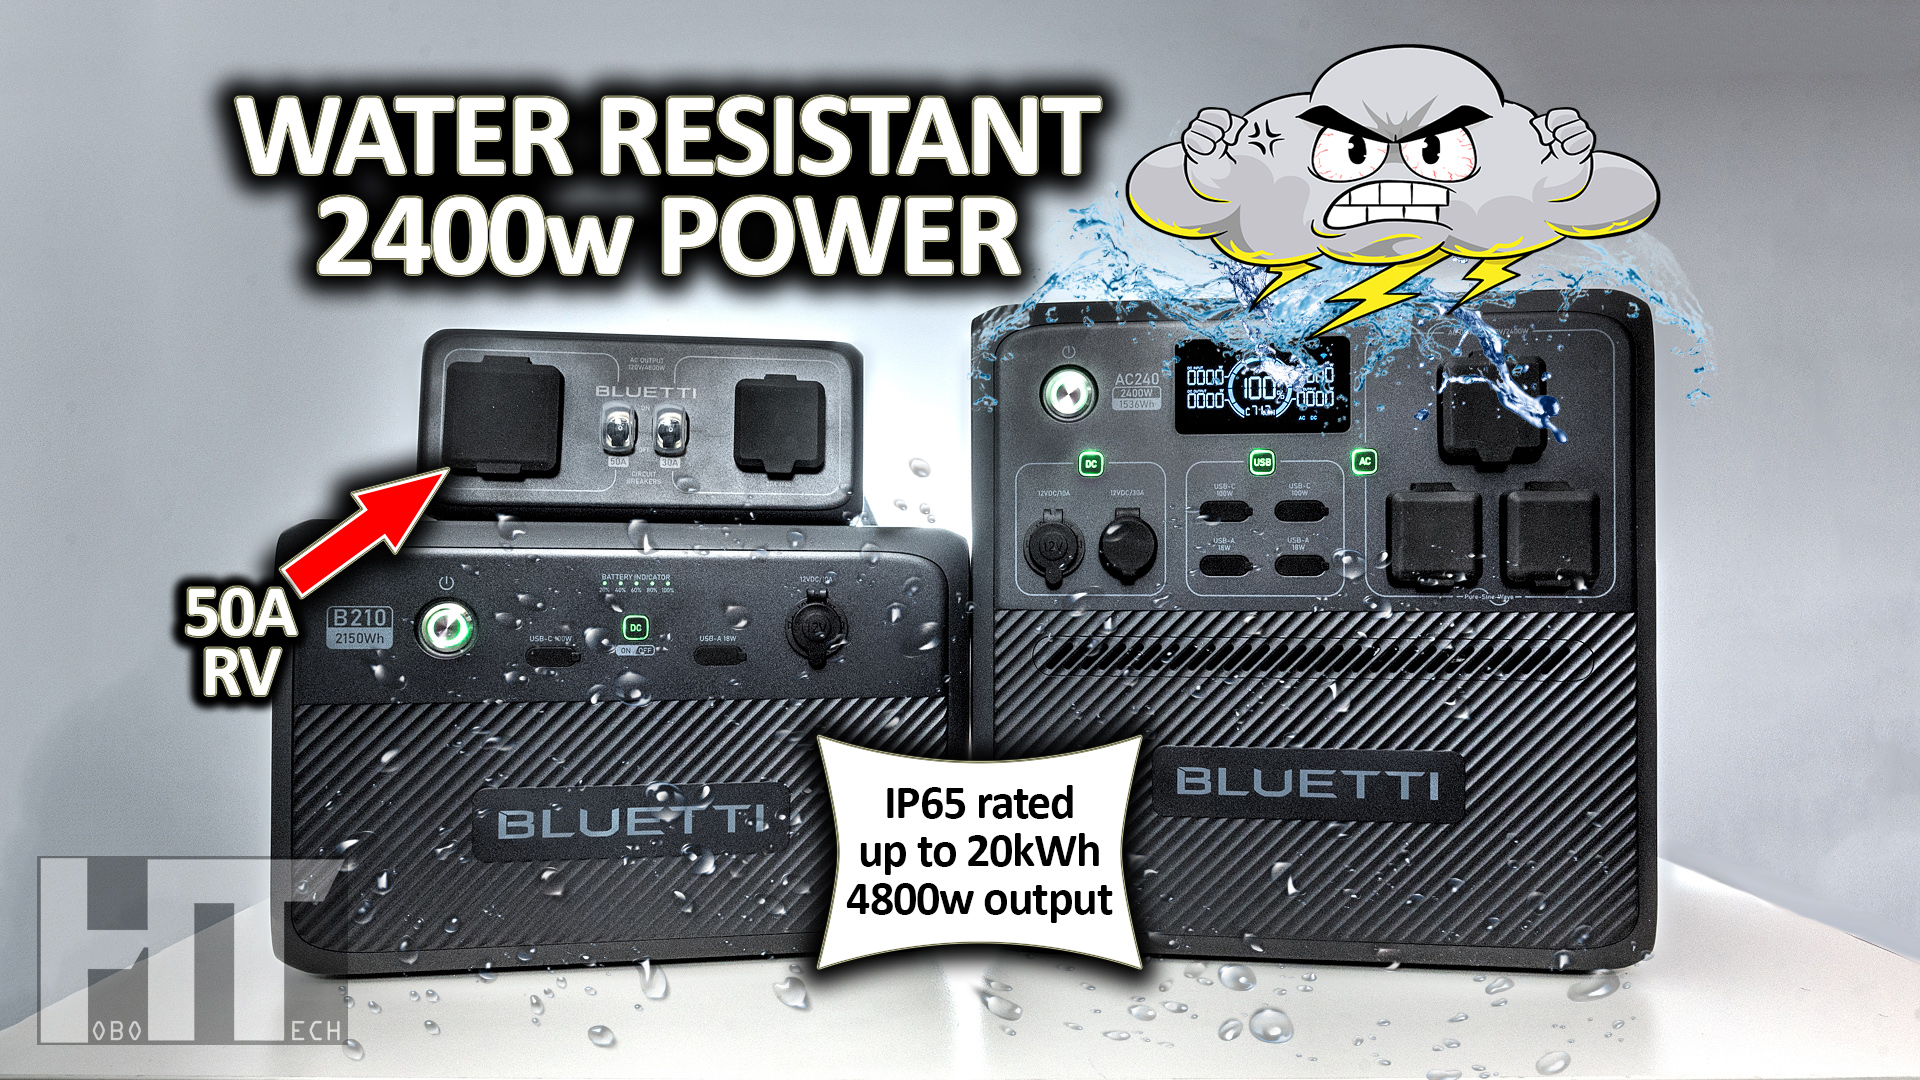
The Professor reviews the IP65 water resistant Bluetti AC240 solar generator and B210 modular battery bank good for up to 20kWh of power and 4800w output in parallel mode.
-
Bluetti has released yet another AC200 series power station that oddly seems to compete with it’s own most recent release, the AC200L. Despite having a smaller battery, this one is called the AC240. So what’s the big deal? Well the AC240 comes packing some new features not supported in any of their other midsize offerings. Such as an inverter parallel ability only found in their flagship products (so you can hook two together for more power), direct battery expansion support up to 20kWh with their new B210 battery, a new app-free interface that lets you change all the settings without needing an app and then turn off all WiFi and Bluetooth, and last but not least… IP65 water resistance. It certainly ticks a lot of boxes. But, is it any good? Let’s find out!
Features
-
Battery Capacity/Tech/Cycles: 1536wh LFP battery rated 3500 cycles to 80% capacity and can be expanded up to a whopping 10kWh of capacity (20kWh if in parallel mode) using the new IP65 rated B210 expansion battery we’ll check out in a bit.
-
Size/Weight: It measures a tall 17 x 12 x 16 inches and weighs in at a meaty 72 lbs – this is 10 pounds heavier than the AC200L, that has a larger battery and same size inverter. Not really sure where it packed on 10 extra pounds but mcdonalds did reintroduce the double big mac recently. Hmm…
-
Design/Display: The AC240 rocks the same high quality color LCD as their other models, and this one shows you everything you need to know from watts in and out to time to charge and discharge. I counted 29 total pieces of information on display. Dang.
-
Inverter Size/Type: This has the same power inverter as the AC200L or 2400w with a brief 3600w surge. Of course they offer their proprietary “power lifting” feature that claims to power resistive devices up to 3600w, but it does this by dropping the voltage of the inverter. I always suggest turning this feature off to prevent damaging your appliances.
-
Ways To Charge:
-
The AC240 can charge via AC wall outlet or grid power using the included cable, up to 2200w for charging from 0-80% in 45 minutes. However, this product is factory locked to 1800w and in order to unlock faster charging you need to get a pass code from support. Just be aware of that.
-
It can of course charge from solar with the built in 1200w MPPT controller in a “theoretical” 2 hours under perfect conditions. However, unlike the AC200L’s 145v controller, this one is limited to a maximum of 60 volts at 21 amps. That’s right. 60 volts. That’s going to make it quite difficult to hit that magic 1200w mark because you’d need the perfect series-parallel combo of panels to reach 60 volts at 21 amps without over volting. Remember, “you can over amp but you can’t over volt”. Over volting a power station will result in either a shut down, or smoke. We’ll get deeper into this situation, in a moment.
-
Last and certainly least you can charge from a 12 or 24v source at 8.2 amps that’s good for 100w and 200w of charging respectively.
-
-
12v Output Types: Bluetti decided to ditch the fancy new proprietary 48v output on this model and go back to the very useful 30A 12v output that van lifers, RVers, and hobbyists love. There is also the standard 10A lighter socket for powering your retro items.
-
USB Output Types: The AC240 offers the typical pair of USB-C 100w PD outputs alongside a pair of 18w USB-A QC ports. This is standard fare nowadays with most midsize power stations.
-
Other Outputs: Note that Bluetti doesn’t seem to be offering wireless charging pads anymore on their latest offerings and this product is no exception. I personally miss the wireless pads. Maybe because this is a stackable product they opted out this time.
-
Other Features:
-
The AC240 does offer the aforementioned Parallel ability where you can use an optional hub to connect two AC240’s together. This shares the inverter and battery power between the two units equally and will split the loads. However, this parallel ability has a very important limitation that we’ll review in a moment.
-
App haters rejoice! You no longer need an app to change the major behind the scenes settings in your AC240. You can also opt to disable all wireless access permanently until you decide to turn it back on.
-
The AC240 and B210 are rated IP65 dust proof and water resistant. This means dust can’t get inside and you can shoot a ¼ inch stream of water at 3 gal/min from any direction into the unit with zero damage done. This is very handy if you need power outdoors in severe weather or on a boat.
-
-
Warranty: 6 year warranty for both the AC240 and its B210 battery
Testing
-
DC Battery Capacity Test (time lapse): 1210wh/1536 for 79%. If you were paying attention to the time lapse you’ll notice I was using the 30A output instead of the cigarette lighter. I did this to speed up the test thinking that it may score better around 20A. It certainly didn’t help. The AC200L scored 5% better on this test, but it doesn’t offer the coveted 30A output of the AC240 so it’s going to be more efficient at DC.
-
AC Battery Capacity Test (time lapse): 1270wh/1536 for 83%, which is average for the industry but nowhere near the 91% scored by the AC200L. I assumed these two inverters at 2400w were identical but they can’t be, and we’ll verify this in a moment.
-
Phantom load / Parasitic drain test
-
DC consumption: used 177wh (%) over 12 hours or about 354wh over 24 hours. This is on par with other midsize stations and pretty close to what the AC200L scored.
-
AC consumption: used 109wh (%) over 4 hours or about 654wh over 24 hours. If you left the inverter on it would totally kill the battery in under 3 days. This is literally double the idle consumption of the AC200L, so this tells me that they are using a totally different 2400w inverter on the same 51v battery architecture.
-
-
I’m always asked how long stuff will run. Compensating for usable capacity, you can pause this chart to see approximately how long common appliances will run on this unit.
-
13500 btu RV a/c (1200w @50% cyc): 2 hrs
-
6000 btu window a/c (400w @50% cyc): 6 hrs
-
20cuft modern fridge (1.2kwh/day): 1 day
-
1500w heater: <1 hour
-
1200w microwave (1800w): 40 mins
-
Keurig coffee maker (1200w 60wh/c): 20 cups
-
Instant Pot (1000w @50% cyc): 3 hrs
-
Hot plate (500w): 3 hrs
-
55” LED TV (80w): 15 hrs
-
Macbook (60w): 20 hrs
-
Box Fan (50w): 24 hrs
-
CPAP (30w): 40 hrs
-
Chromebook (15w): 3 days
-
Tablet (5w): 5 days
-
-
Sine wave check under load: 120v / 60hz
-
Inverter capacity test (max): 3200w >5s
-
Cooling ability test (rated @ 5mins): 2400w max
-
Inverter fan noise db: 49
-
Max Charge Rate AC @ watts/volts: fast w ; quiet w; standard w
-
DC Input Range: 12-60v
-
Max Charge Rate DC @ watts/volts: 12v 100w; 24v 200w; 48v 1050w; max 60v 1020w (equipment limited)
-
Charging fan noise db: AC max 43db ; AC min 0db ; Solar 0db
-
Simultaneous charging ability: 1020w solar + 1180w AC = 2200w (amp limited)
-
Pass thru / UPS: 15ms pass with PC test
-
DC Output(s) Max Rate: 10A 12.6v; 30A @ 360w pass
-
12v output(s) regulated: 13.6v
-
USB output rate check: 2x 100w pass
-
Wireless/other output: na
-
Amp interference test: pass
-
AM radio test: inverter noisy
-
EMF test: 70 (very high)
-
My Opinion
-
The AC240 is another fine product from Bluetti, a brand that releases more new products each year than most hobos change their underwear – present company excluded. The new parallel ability is very cool along with the ability to store up to 20kWh of power if you max out the battery capacity with 8 of those B210 batteries. I like the new B210’s. They’ve managed to squeeze 100wh more power than the B230 for only one extra inch of space. However, like the AC240, it’s quite a bit heavier. Like 14 more pounds than the B230. So this doesn’t make sense to me. Does IP65 water resistance really create so much more heft? I suppose with the water proof chambers and this mysterious bleed valve system it can. But for the customer, is the extra size and weight worth it? I’ll leave that up to you.
-
One thing that I know app haters will adore is the ability to change all the major settings and totally disable WiFi and Bluetooth. I was literally just asked this question a week ago, if such a modern power station exists. Now it does.
-
Where the AC240 falls flat in my opinion is the limited solar charging voltage. It maxes out at 60v compared to the rest of the 200-series 145v limit. Maybe Bluetti was trying to reduce the heat inside of this sealed up case? Because of this limit, those that charge with big panels are likely to choose one of the other Bluetti models.
-
The AC240 does shine when it comes to upgradability. If you really need 4800 watts of power in a portable package this is definitely the way to go. Two of these units can be easily placed in just about any vehicle and with a true 30A RV outlet available, you can power a ton of stuff at 120v. Just be aware that the 50A RV outlet on the hub is NOT 240v and will NOT power a 50A RV or any 240v appliance for that matter. I found this out the hard way, and this by design. I did write to the CEO of Bluetti with my complaint, and a dire warning that offering a 240v style NEMA 14-50R outlet that only outputs 120v is going to put them on the chopping block with some customers. I’m hoping that they will update this product or the hub to output split phase 240v as it would be a simple process of running both inverters in opposite phase with each other instead of in the same phase.
Pricing and Competition
-
Product Price with current discount:
-
The AC240 lists at $1399 on Bluetti’s website which happens to be the exact same price as the AC200L. Go figure. However, I do have a discount code in the description of this video that will knock $100 off the AC240 for a limited time until April 29th.
-
-
Recommended Solar Panel Type/Size:
-
As for solar, you can use a pair of Bluetti’s PV420’s in parallel and charge at a solid 800w with no issues, or go for 4 of their PV200’s in series-parallel for the same effect. The PV420 is my go-to choice for a portable panel when camping and I’ve beat the tar out of mine for about 2 years now with zero issues. If you’re looking for something for a more permanent install, check out my list at gohobo.io/solar for ideas.
-
GET THE AC240: https://gohobo.io/ac240 use code HOBO240 for $100 off!
(also score $150 off using code HOBO150 on the AC240 + B210 + 2x PV200 bundle!)
Prefer the AC200L? https://gohobo.io/ac200l
Solar Panel options at: https://gohobo.io/solar


You must be logged in to post a comment.